 How to inspect a diesel car before buying: OBD, DPF, AdBlue, and real-world risks
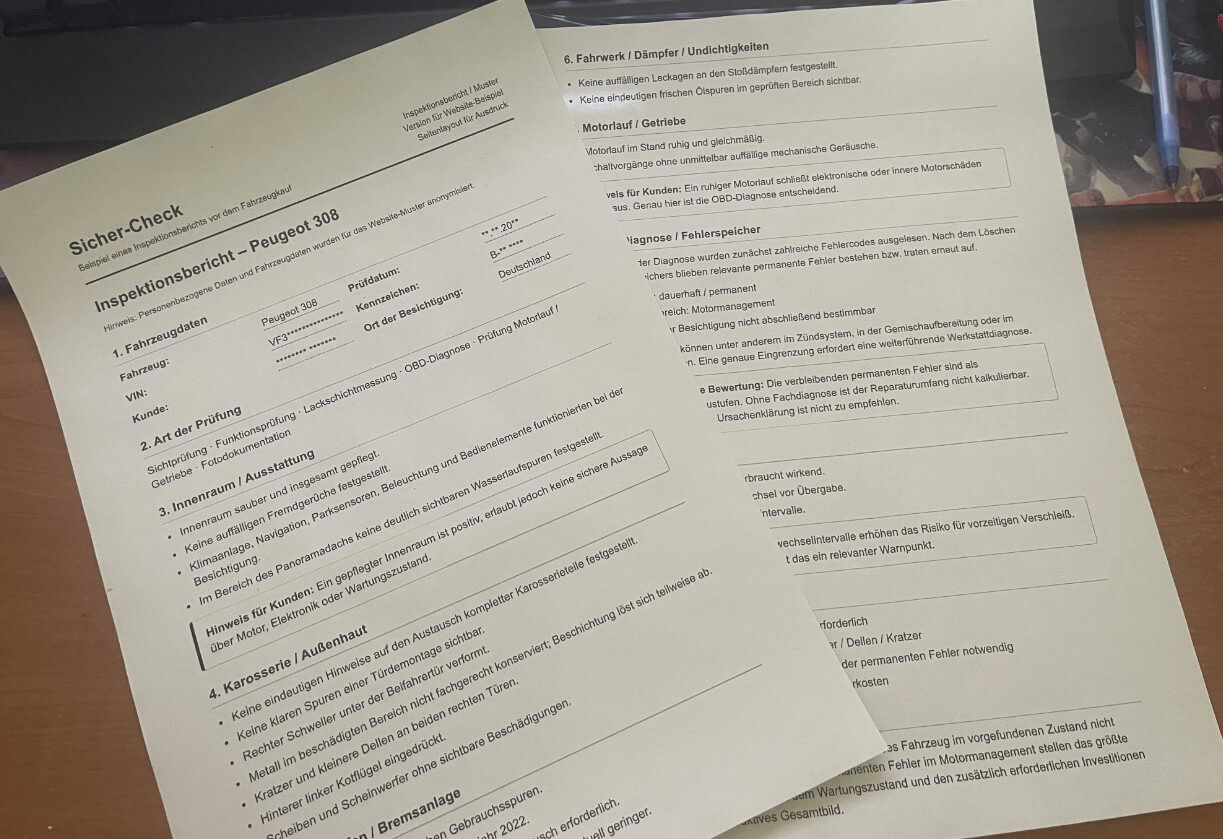
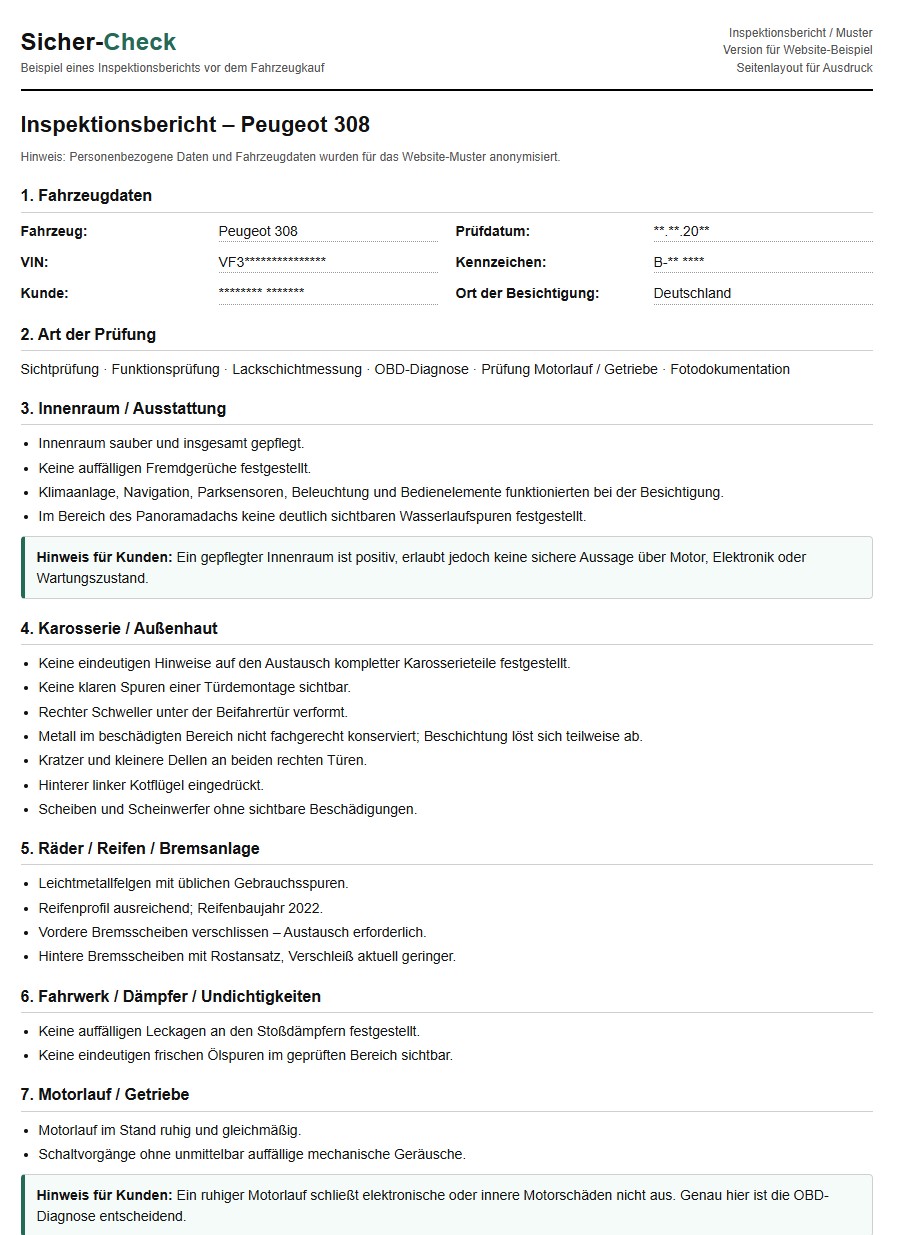
This page is not meant to look nice for its own sake. Its purpose is to show how a real used car inspection report is structured in practice and why a proper pre-purchase inspection is much more than just a quick look at the bodywork and engine bay.
In this example you can see: photo documentation, a cold-start video, paint thickness measurement videos, a measurement chart, two diagnostic reports, and a clear technical assessment.
🧾 Short Description of the Case
The vehicle shown here had normal signs of use: scratches, small dents, visible wear, and several typical age-related irregularities. At the same time, the engine sounded calm and fairly normal when started.
That is exactly what makes this case so instructive. Many buyers would have said that “it still looks quite okay” and that the cosmetic flaws could simply be used as a negotiating point. The real risk zone here, however, was not the initial visual impression but the electronic diagnosis.
🔍 Practical takeaway: Not every problematic purchase candidate looks bad at first glance. Sometimes the real decision is not made by the exterior, but by what is stored inside the control units.
📸 Photo Documentation of the Inspection
In real inspections we always document the condition of the vehicle with many detailed photos. This includes the body, paint condition, panel gaps, interior, wheels, tyres, engine bay, lower edges, visible fluid traces, signs of dismantling, and many other important details.
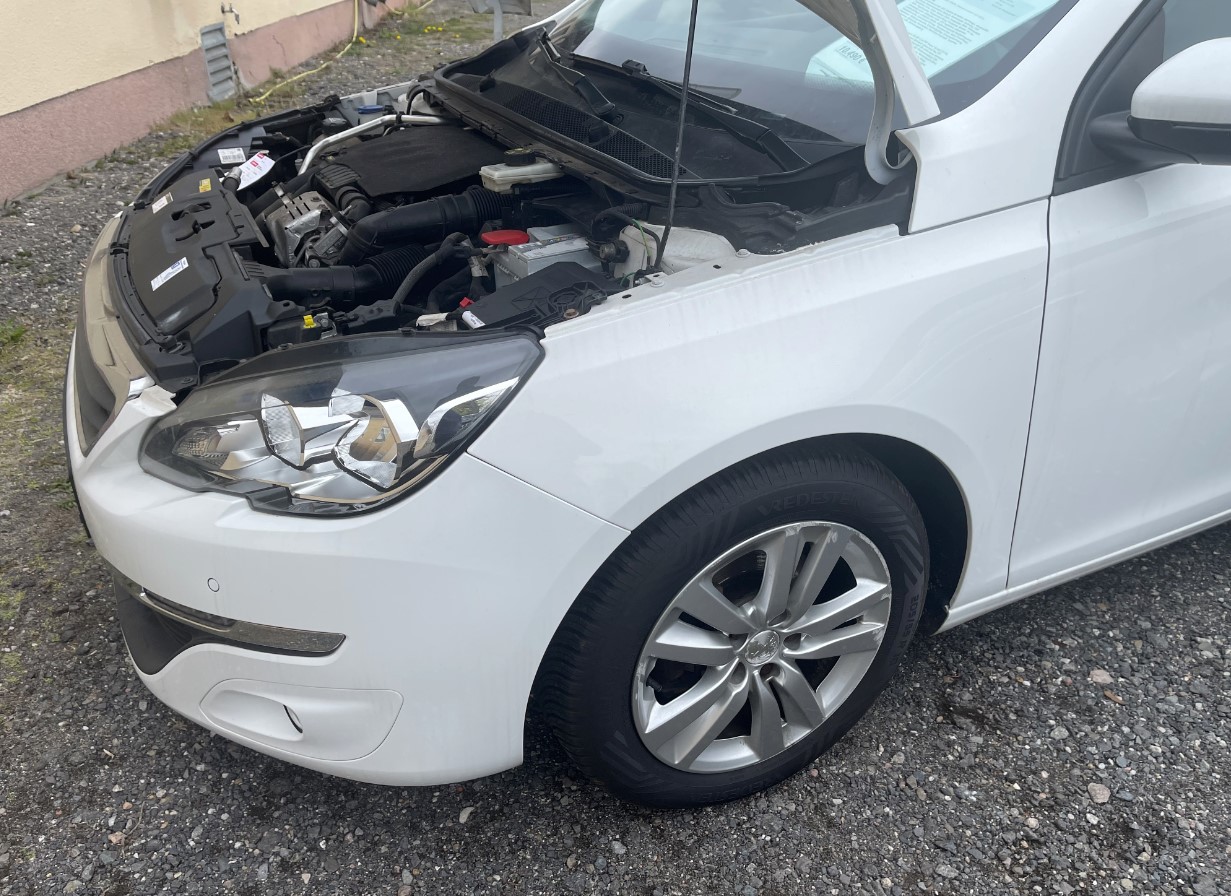
📍 Front view and first overall body impression
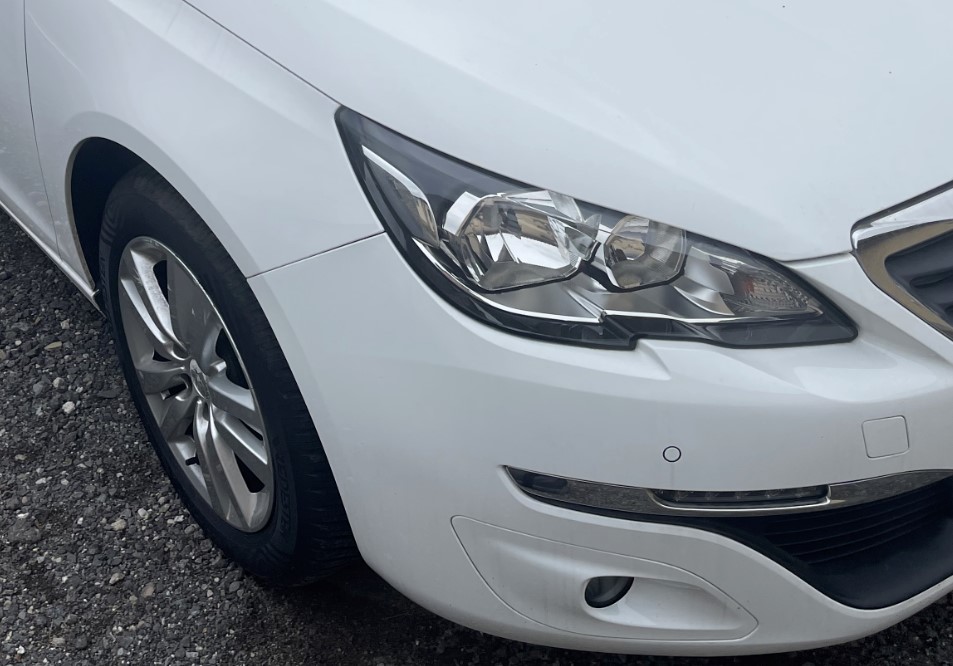
📍 Front bumper, paintwork, and front-end details
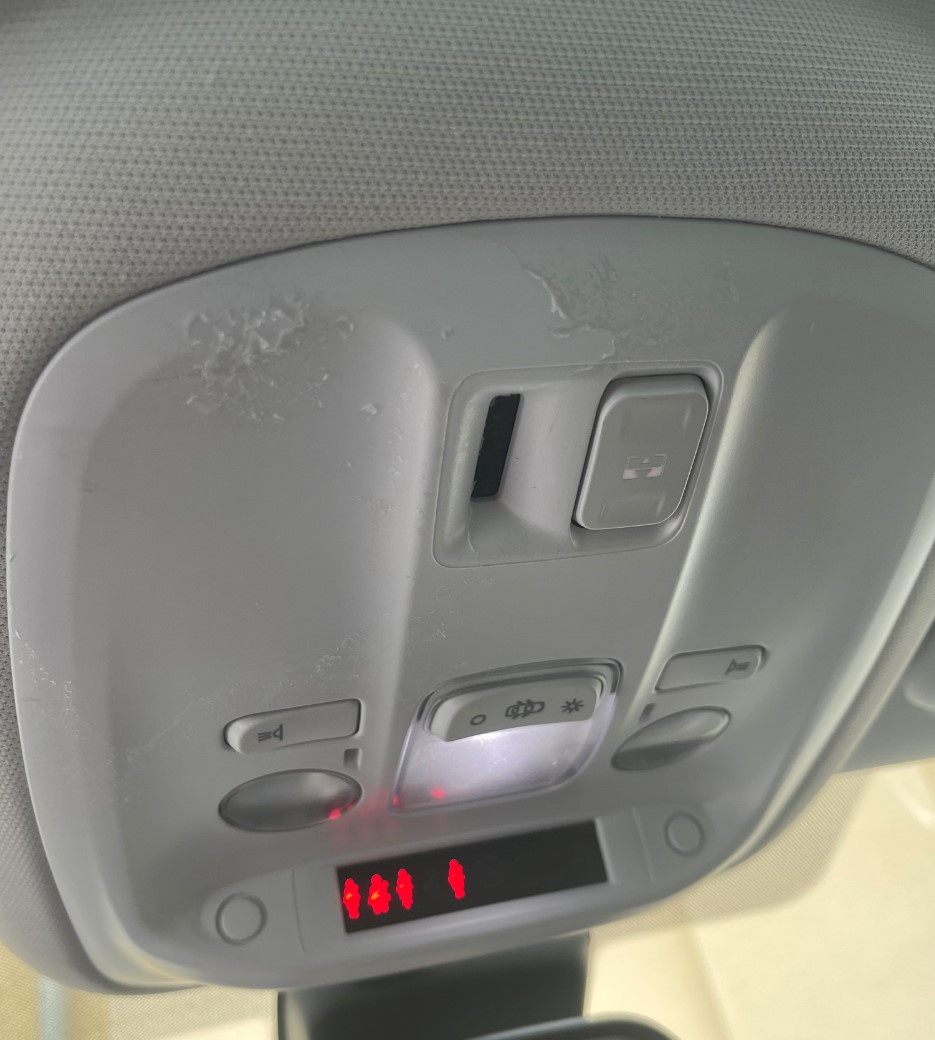
📍 Lighting panel with visible signs of use

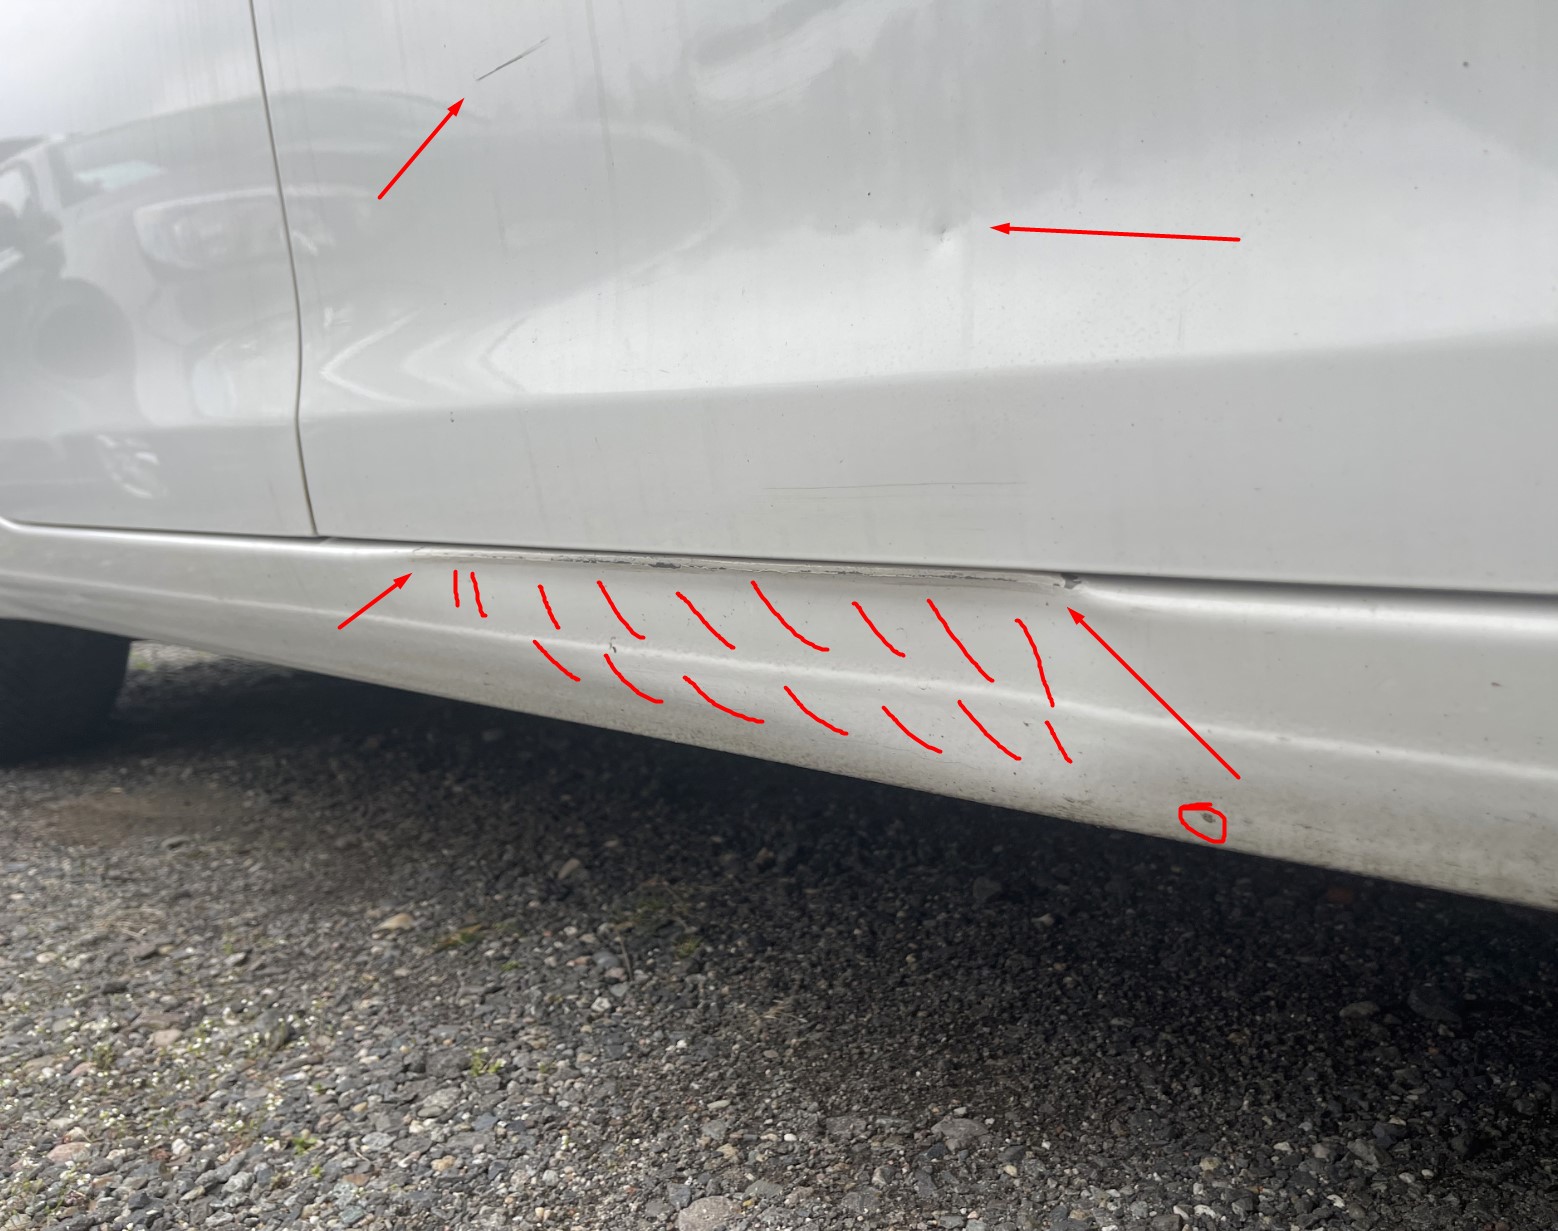
📍 Close-up of a visible defect
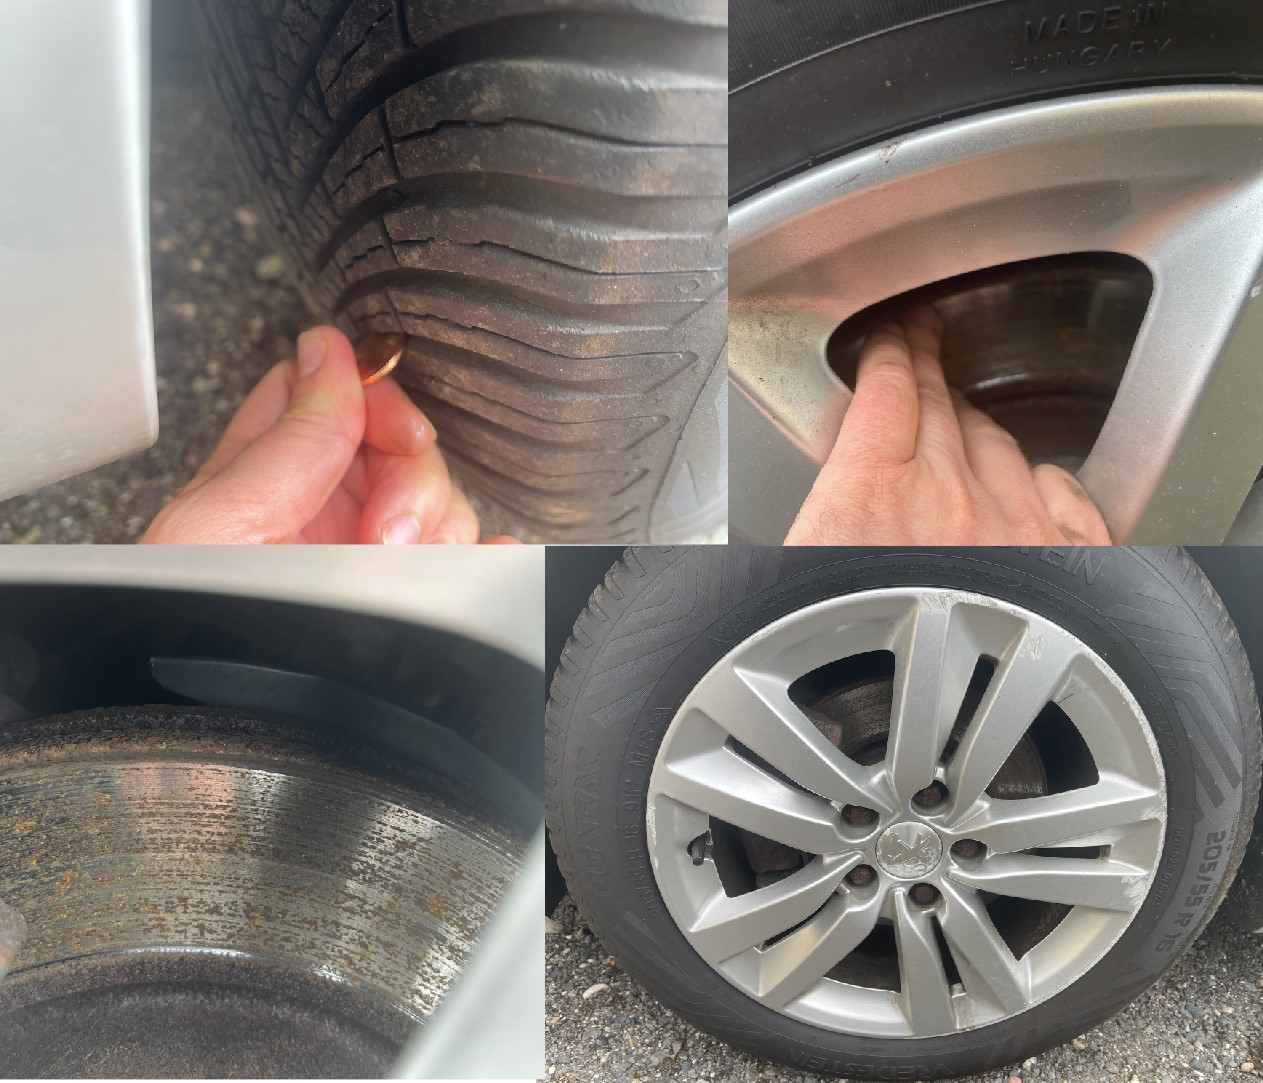
📍 Wheel, tyre, and brake disc
📍 Panel gap and edge alignment check
📍 Engine bay – general overview

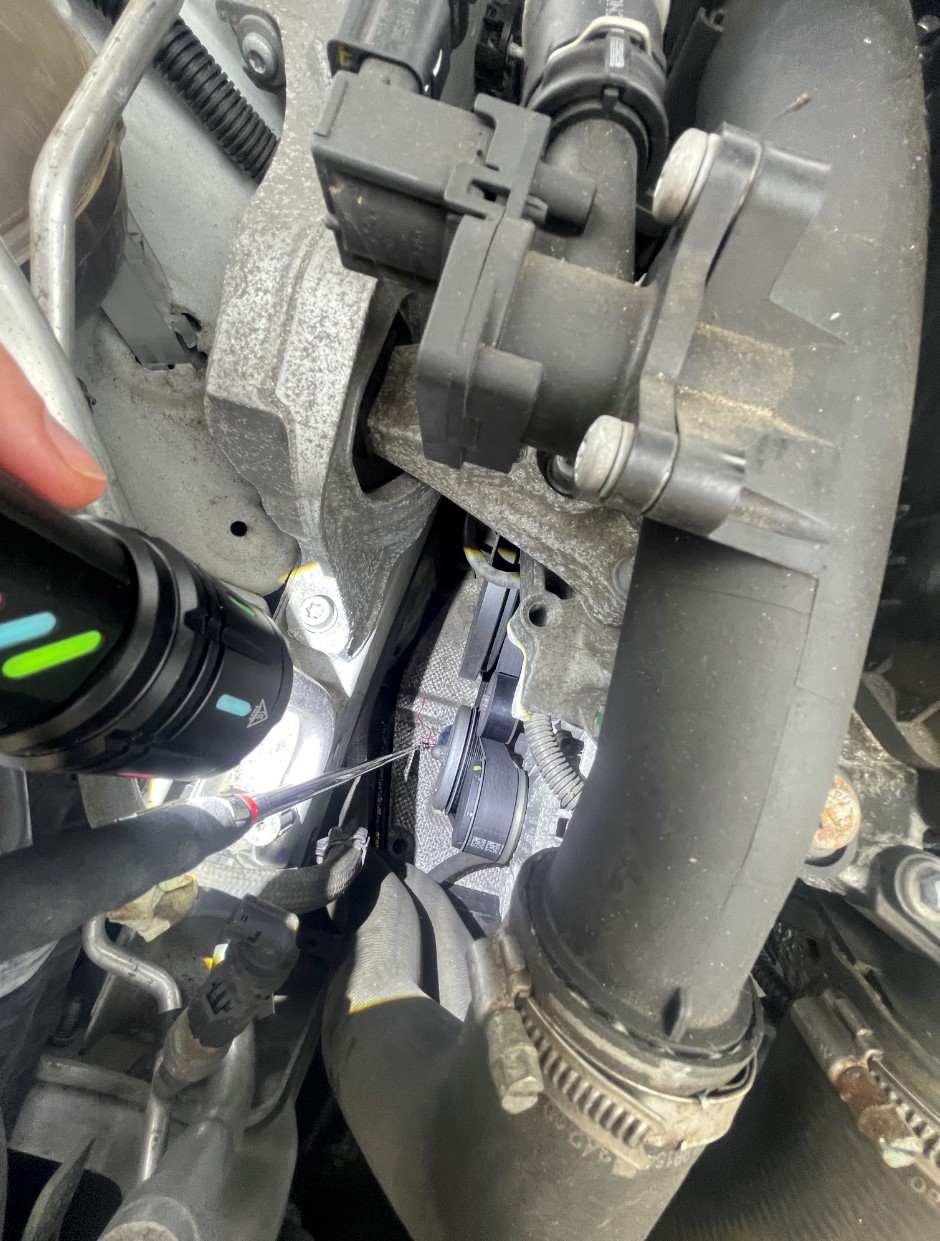
📍 Engine bay – closer detail inspection
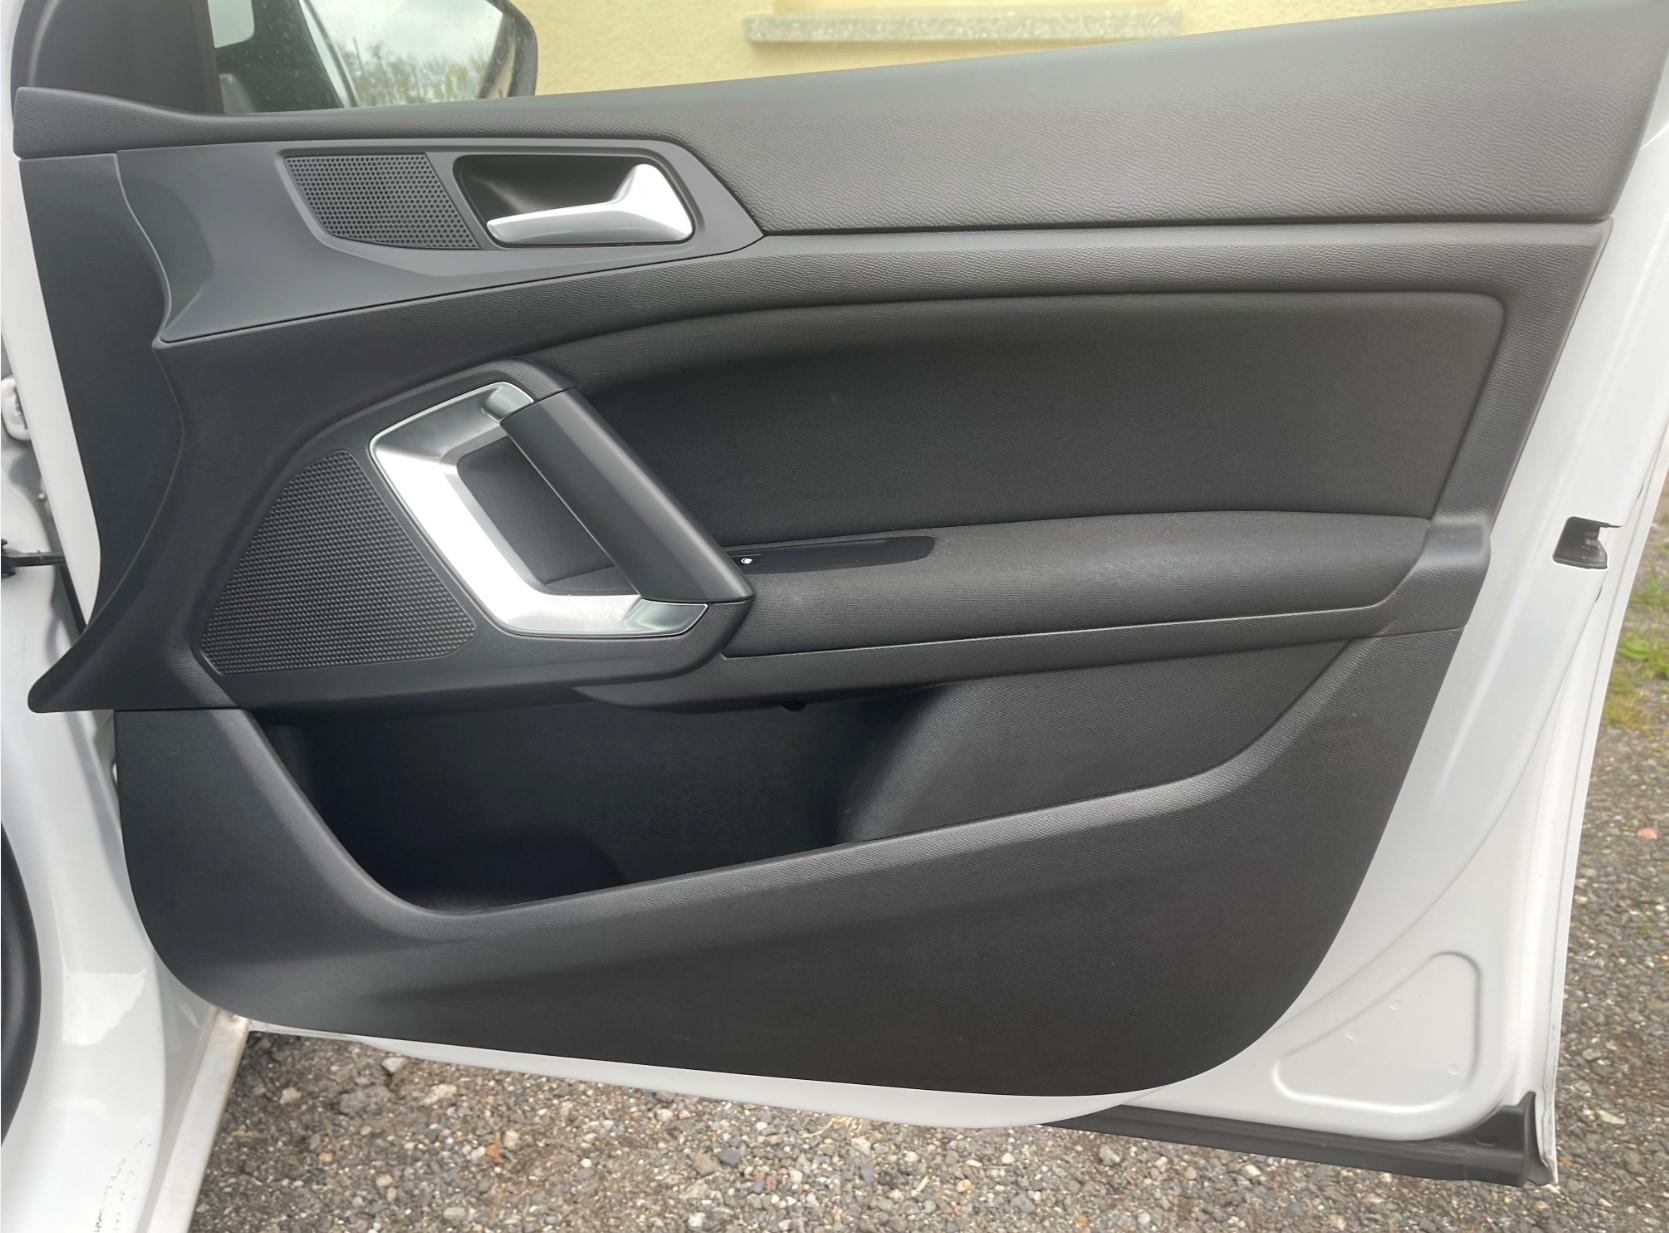
📍 Door area and hinges
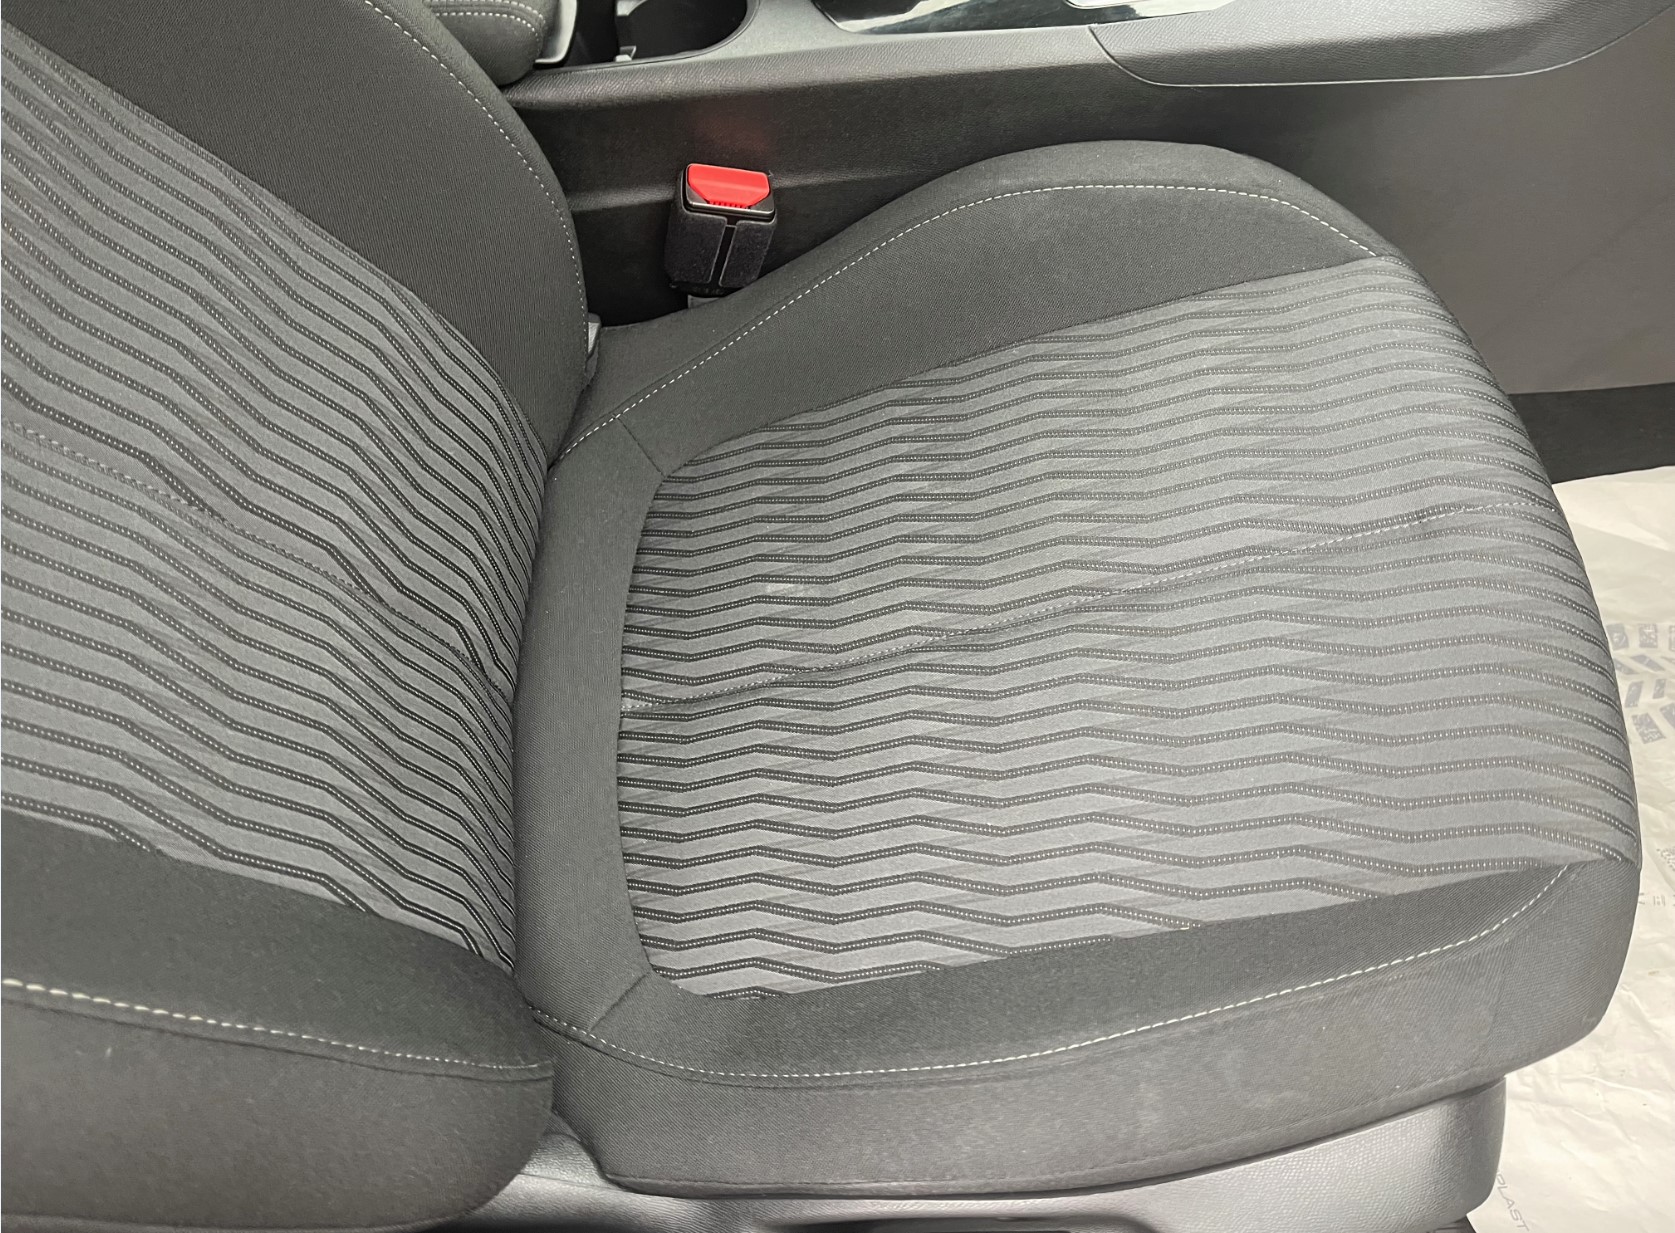
📍 Interior – seat wear and usage marks
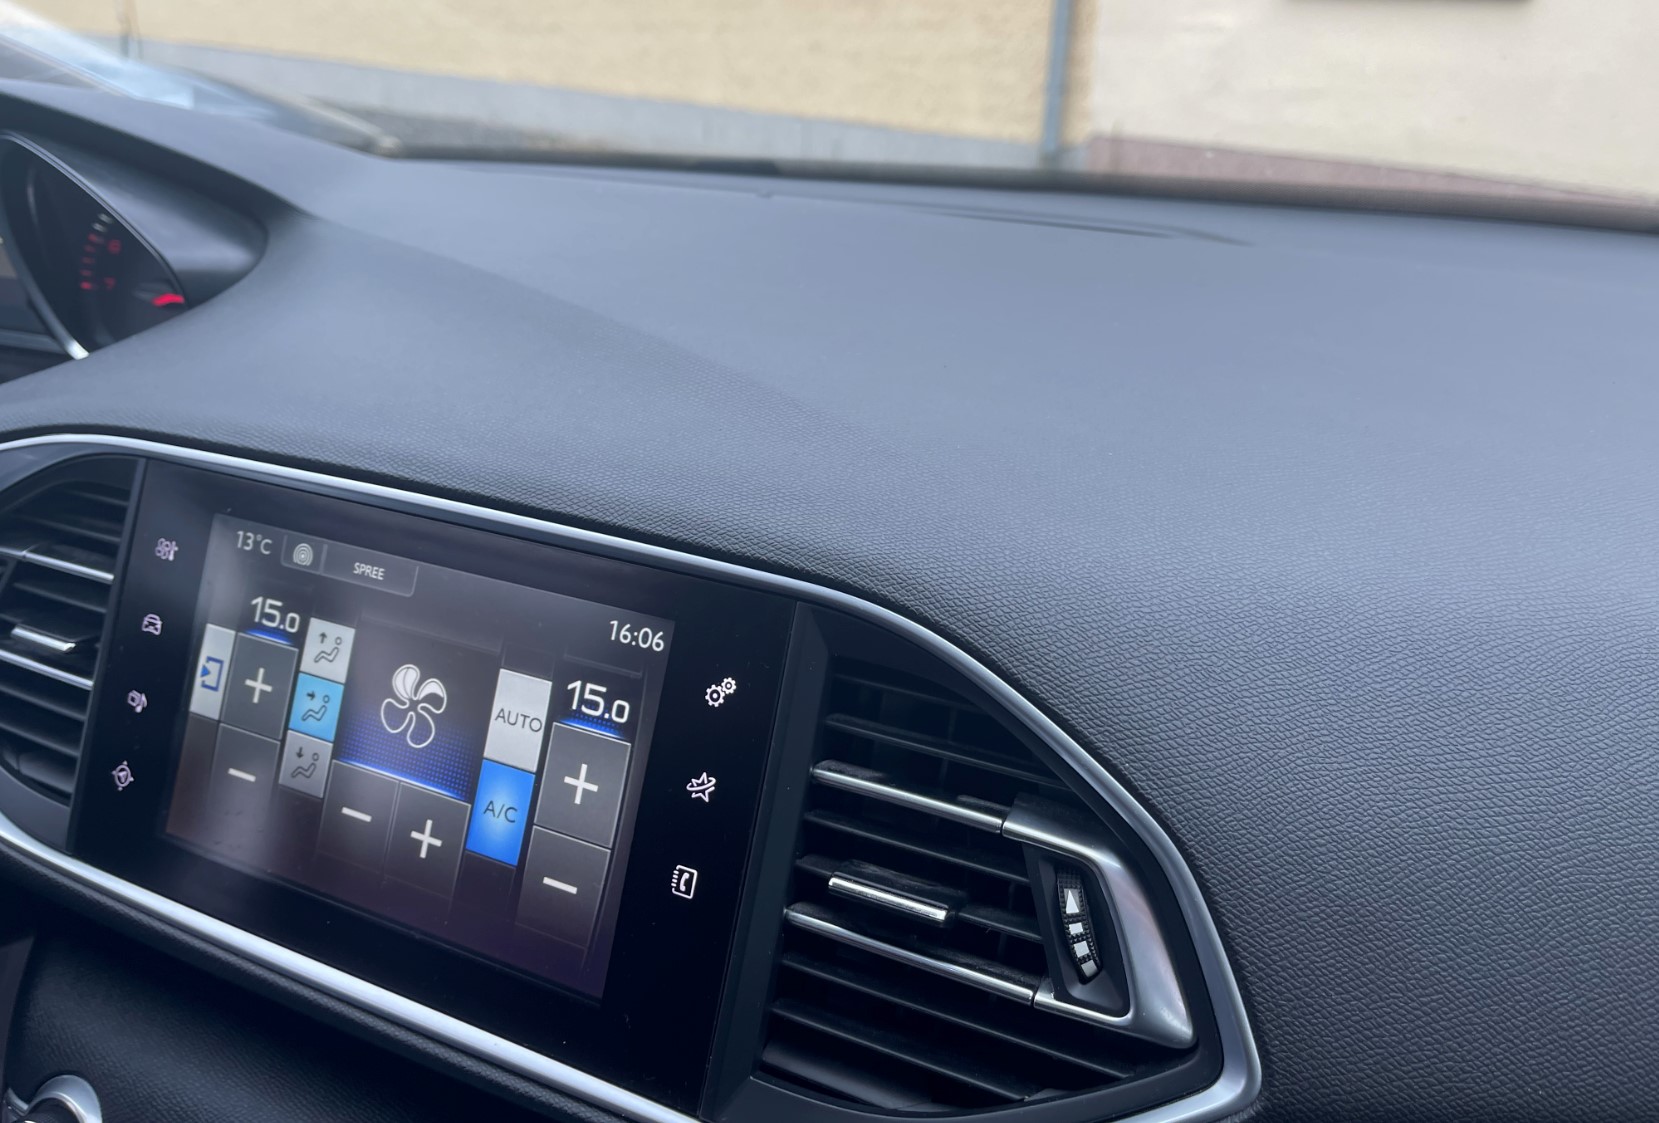
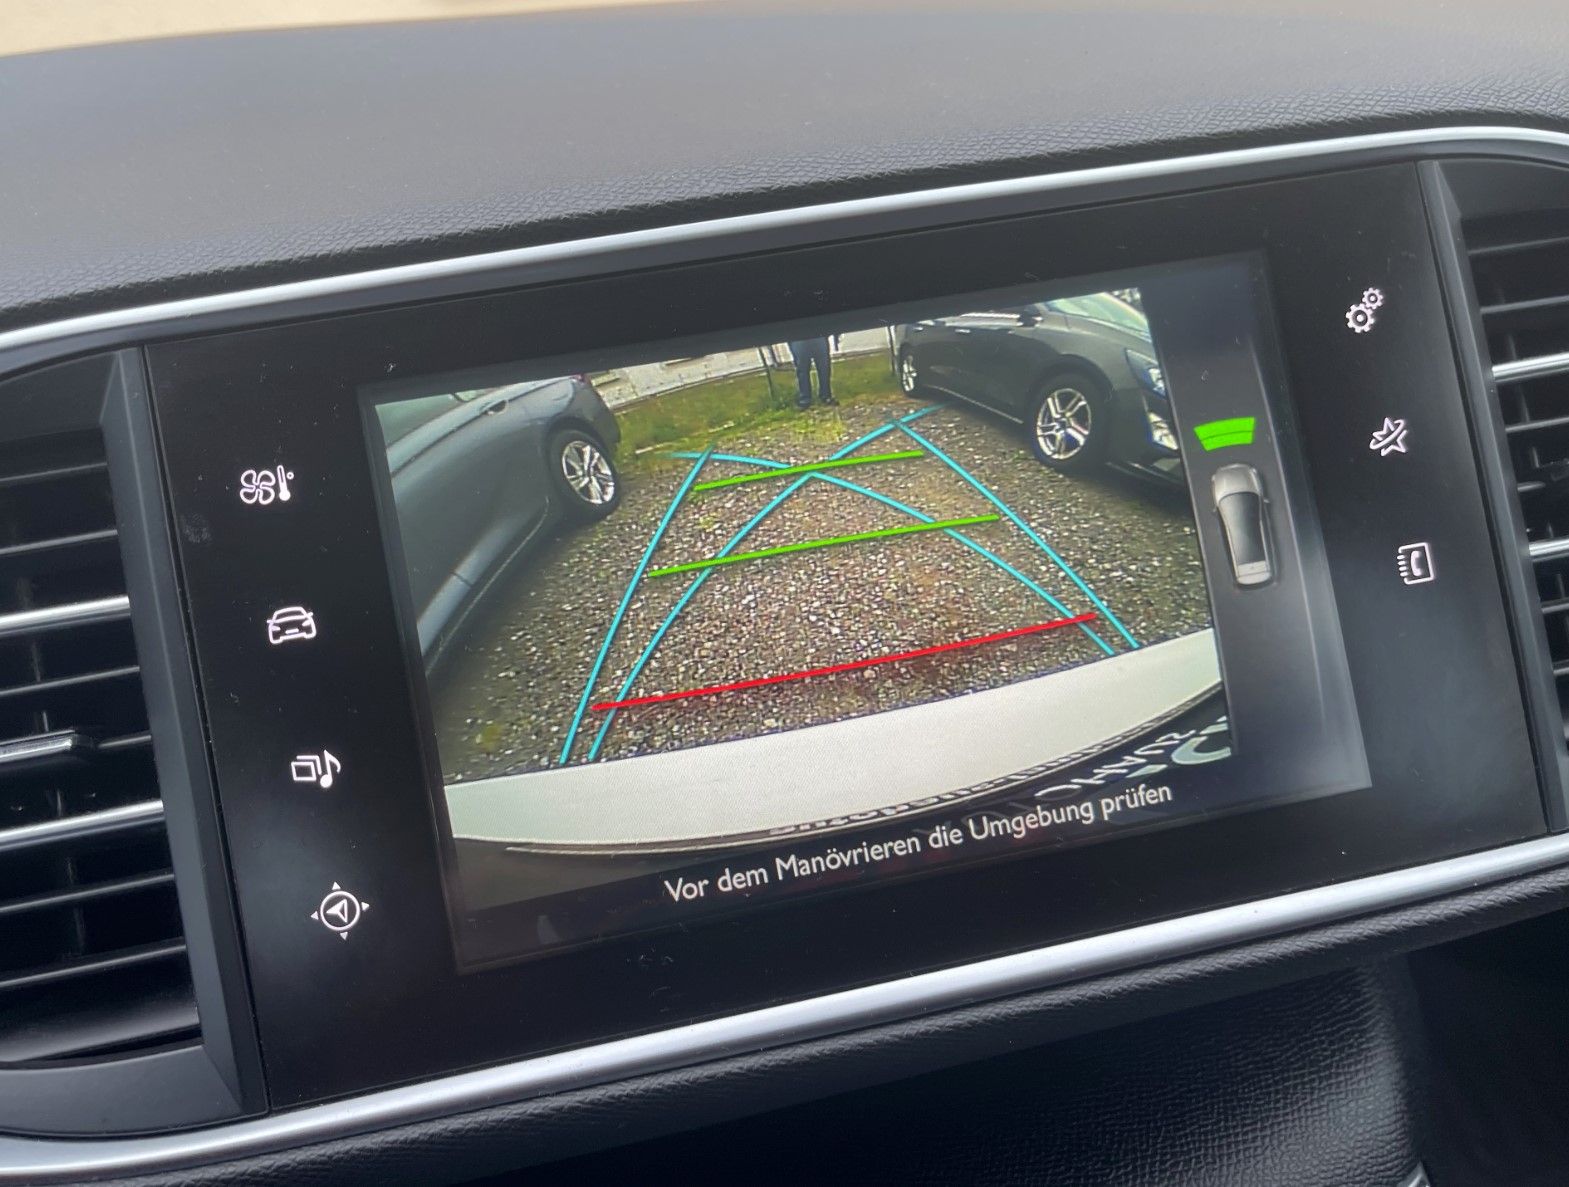
📍 Centre console and control elements
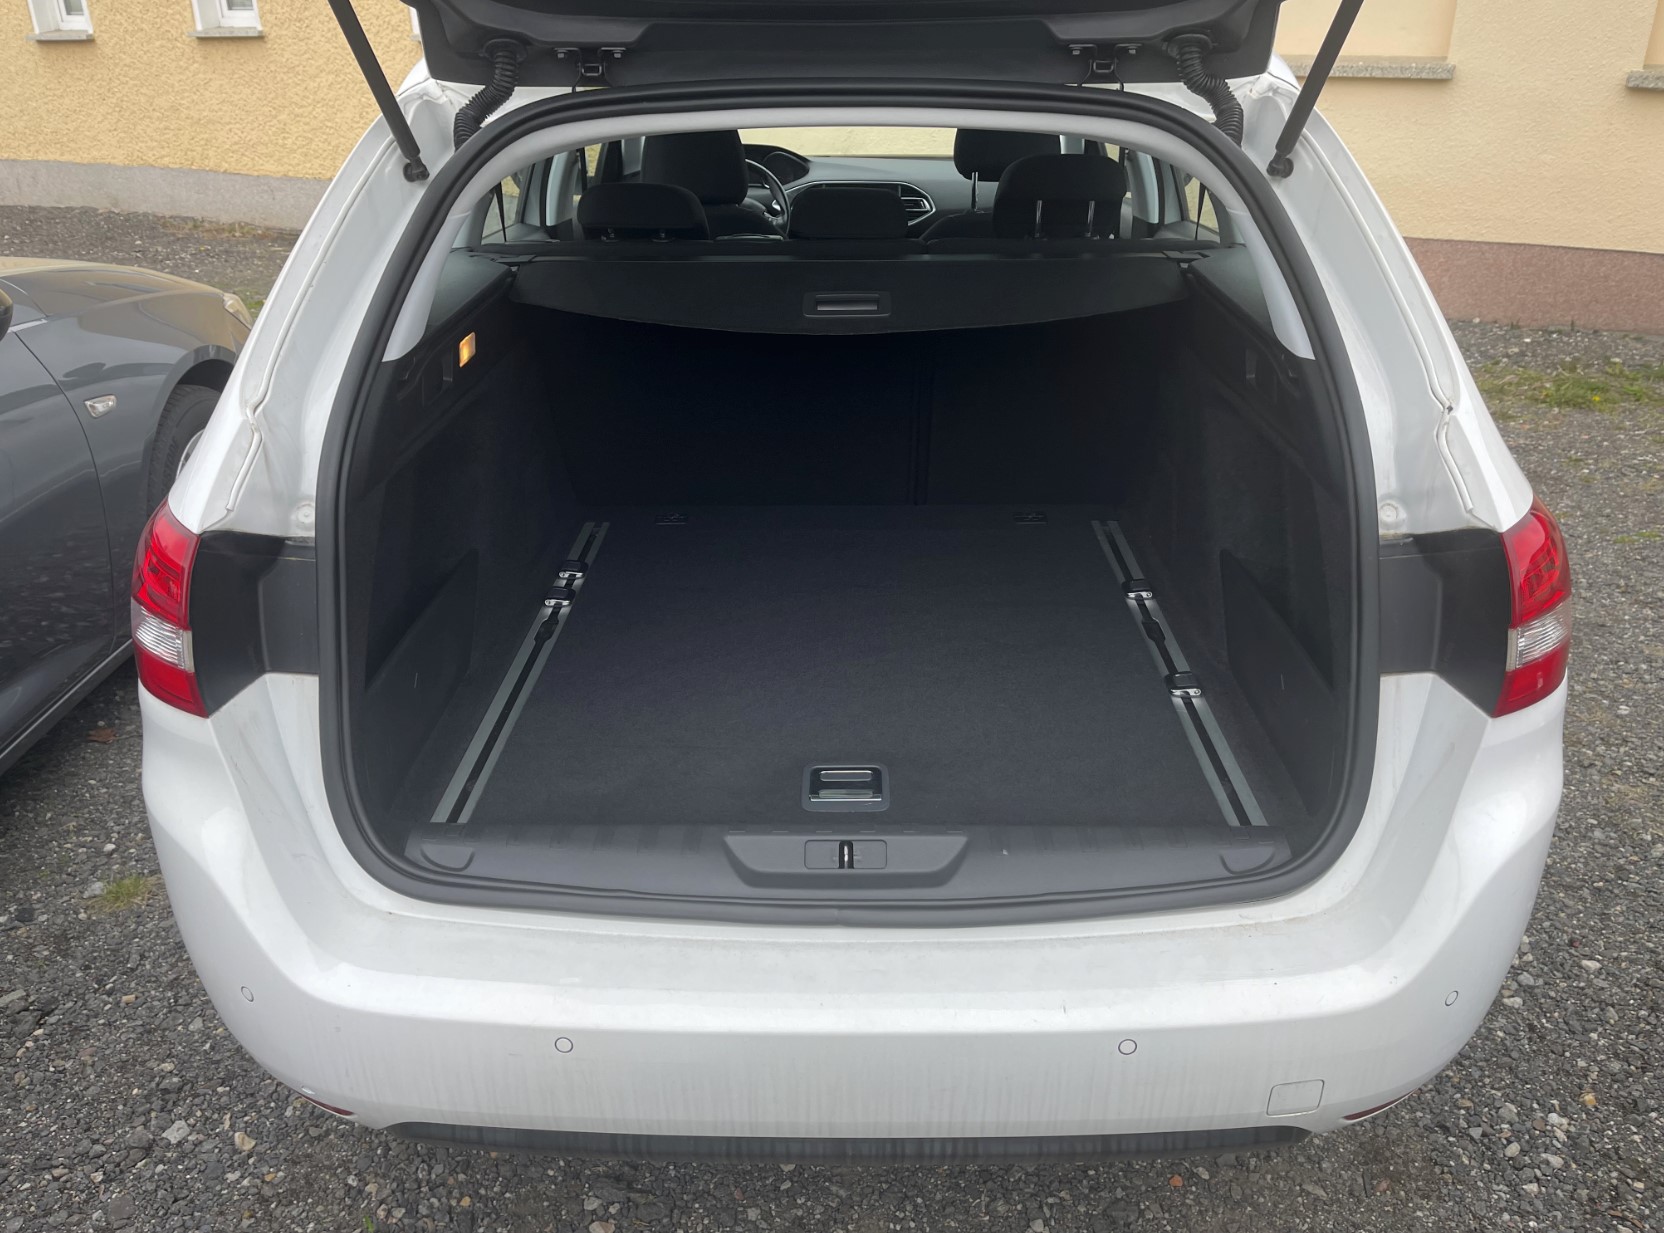
📍 Boot / cargo area
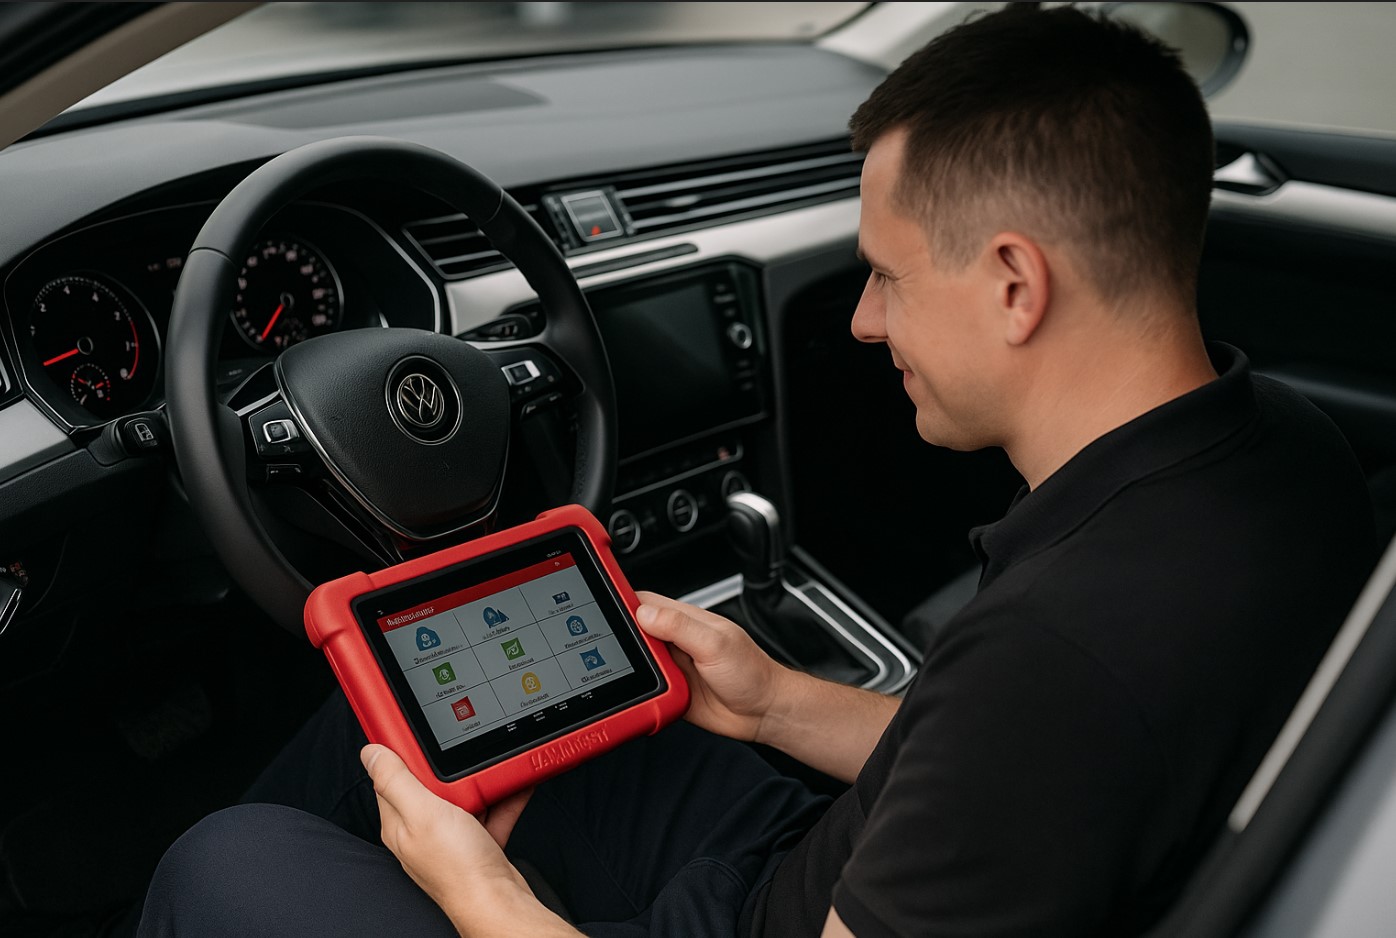
📍 Working inspection process
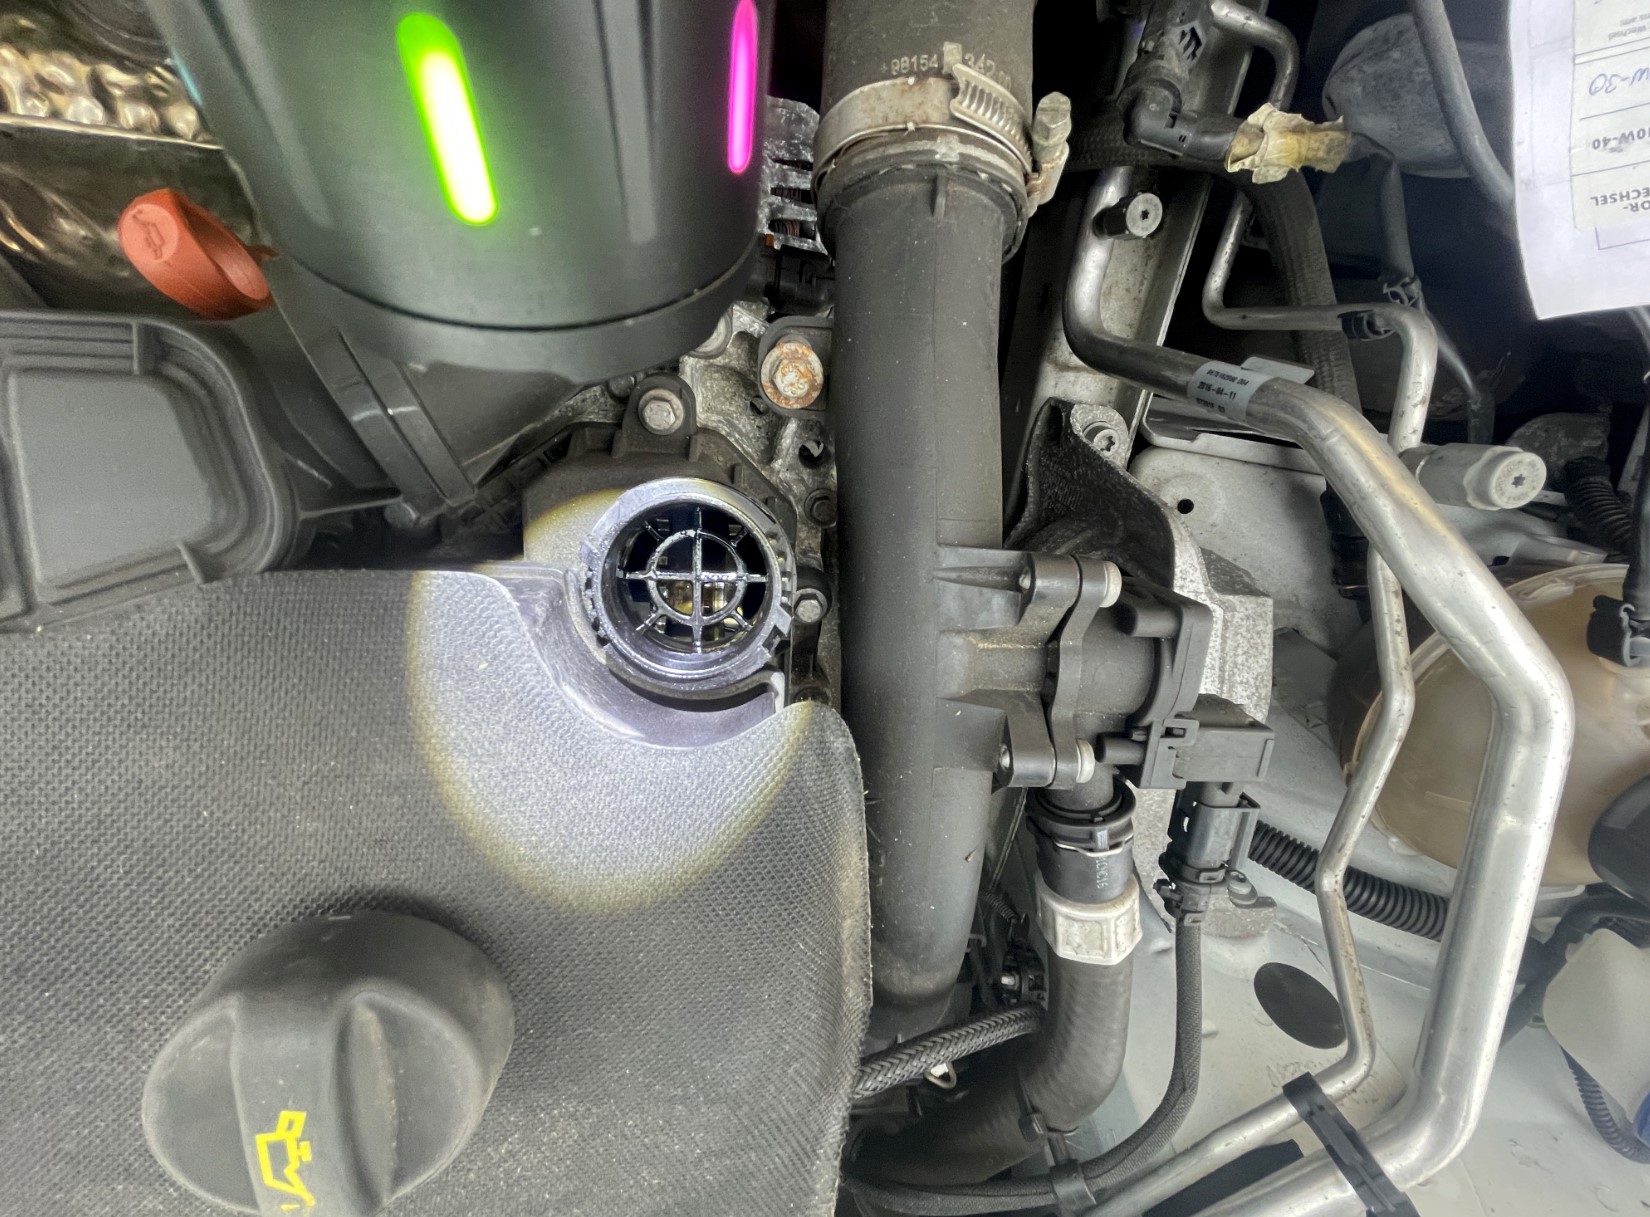
📍 Oil filler cap area

📍 Shock absorber dry
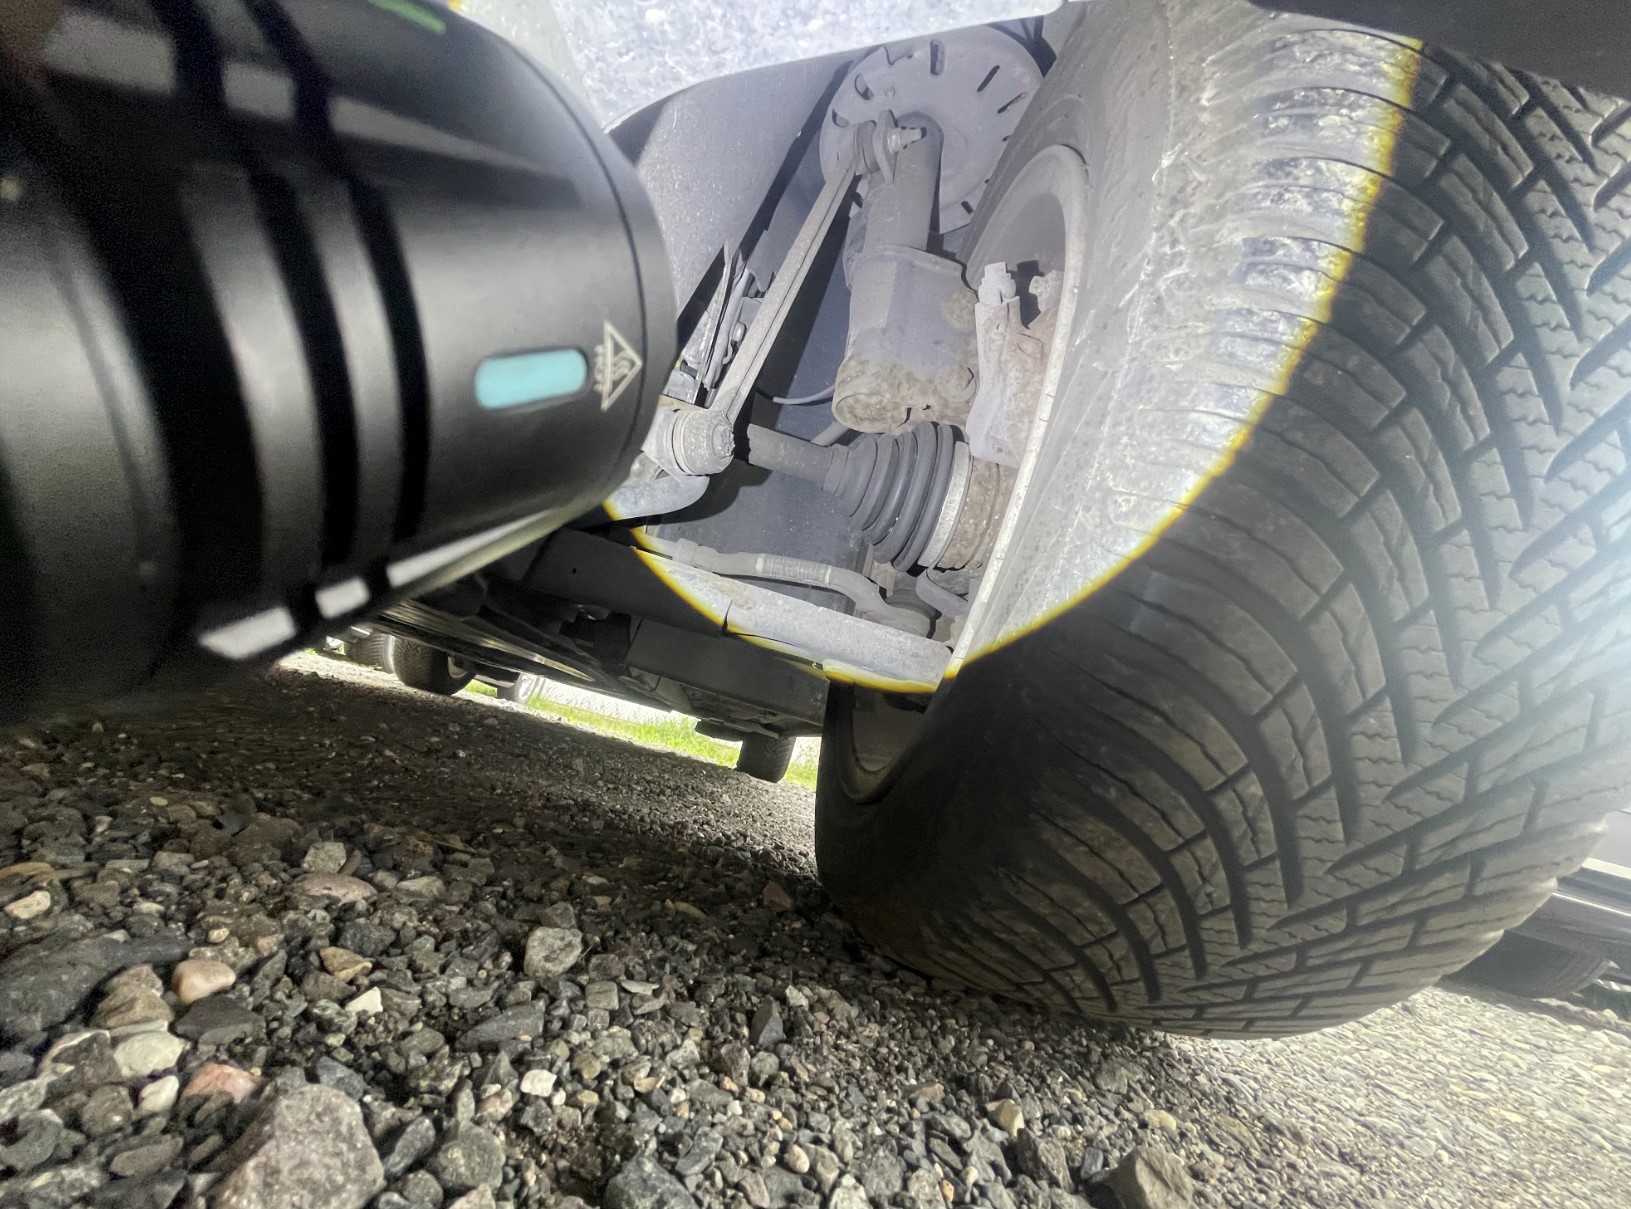
📍 Shock absorber spring
📷 Note on report size: In a real case, the report usually includes 50 or more photos. The larger the vehicle and the more stone chips, dents, scratches, dismantling traces, oil moisture, fluid residues, rust spots, or other irregularities are found during the inspection, the more extensive the photo documentation becomes.
🎥 Videos: Engine Start and Paint Thickness Measurement
Photos show a lot, but not everything. That is why we often supplement reports with videos. Especially useful are recordings of a cold engine start with original sound and videos taken during the paint thickness measurement process.
🔊 Cold start with original engine sound
📏 Paint thickness measurement – example footage recorded during inspection of individual body sections.
🔊 Engine sound with the bonnet open
🎯 Paint Thickness Measurement and Measurement Chart
Paint thickness measurement is an important part of an on-site inspection. It helps identify repainted areas, repair zones, uneven coating thickness, and signs of previous bodywork more accurately.
What matters is not just one reading, but the overall pattern: left-to-right comparison, transitions between panels, plausibility of the values, and how those values match visible traces in the paint or on fasteners and fittings.
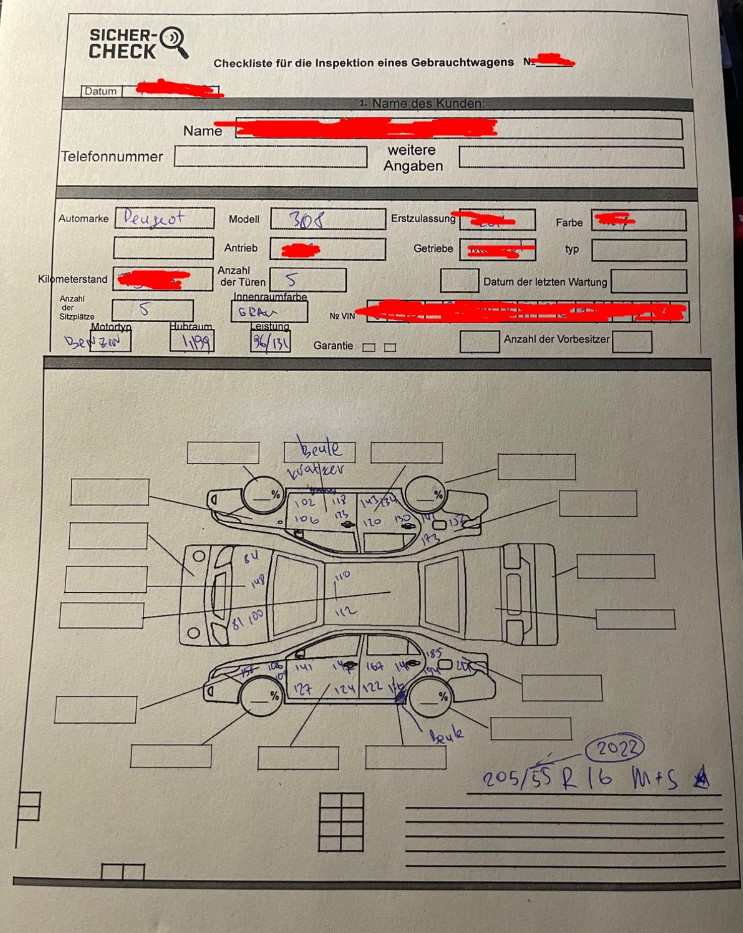
🗺 Example of a measurement chart with documented paint values across several body sections.
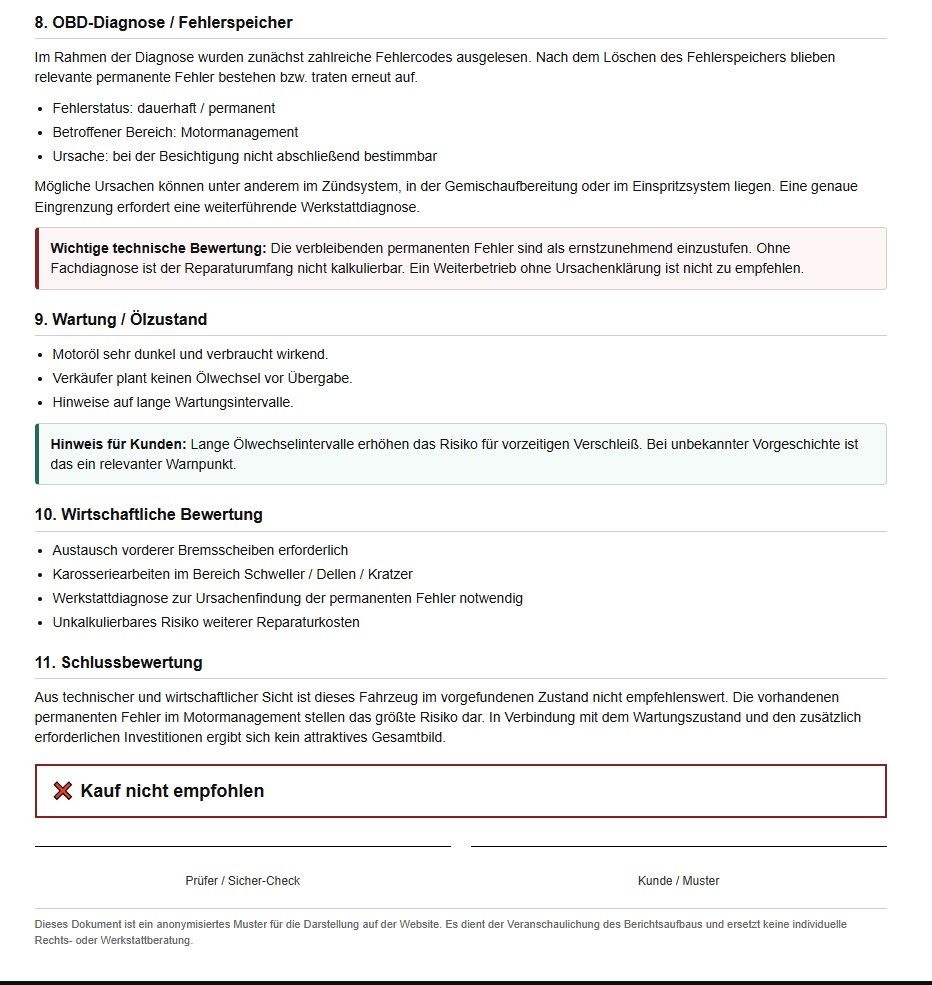
💻 OBD Diagnostics in Two Stages
This section clearly shows why proper diagnostics before buying a used car must be more than a quick look at a single list of stored fault codes. In this case, the diagnostics were intentionally documented in two stages.
1️⃣ First Scan: Many Stored Fault Entries
During the first scan, multiple fault codes were found in the system. That alone does not automatically mean that every single code is a reason to reject the car. Some entries may be historical, some intermittent, and some may be linked to a weak battery or previous operating conditions.
That is exactly why the number of fault codes alone is not the key issue. What matters more is which faults remain after a clean reassessment.
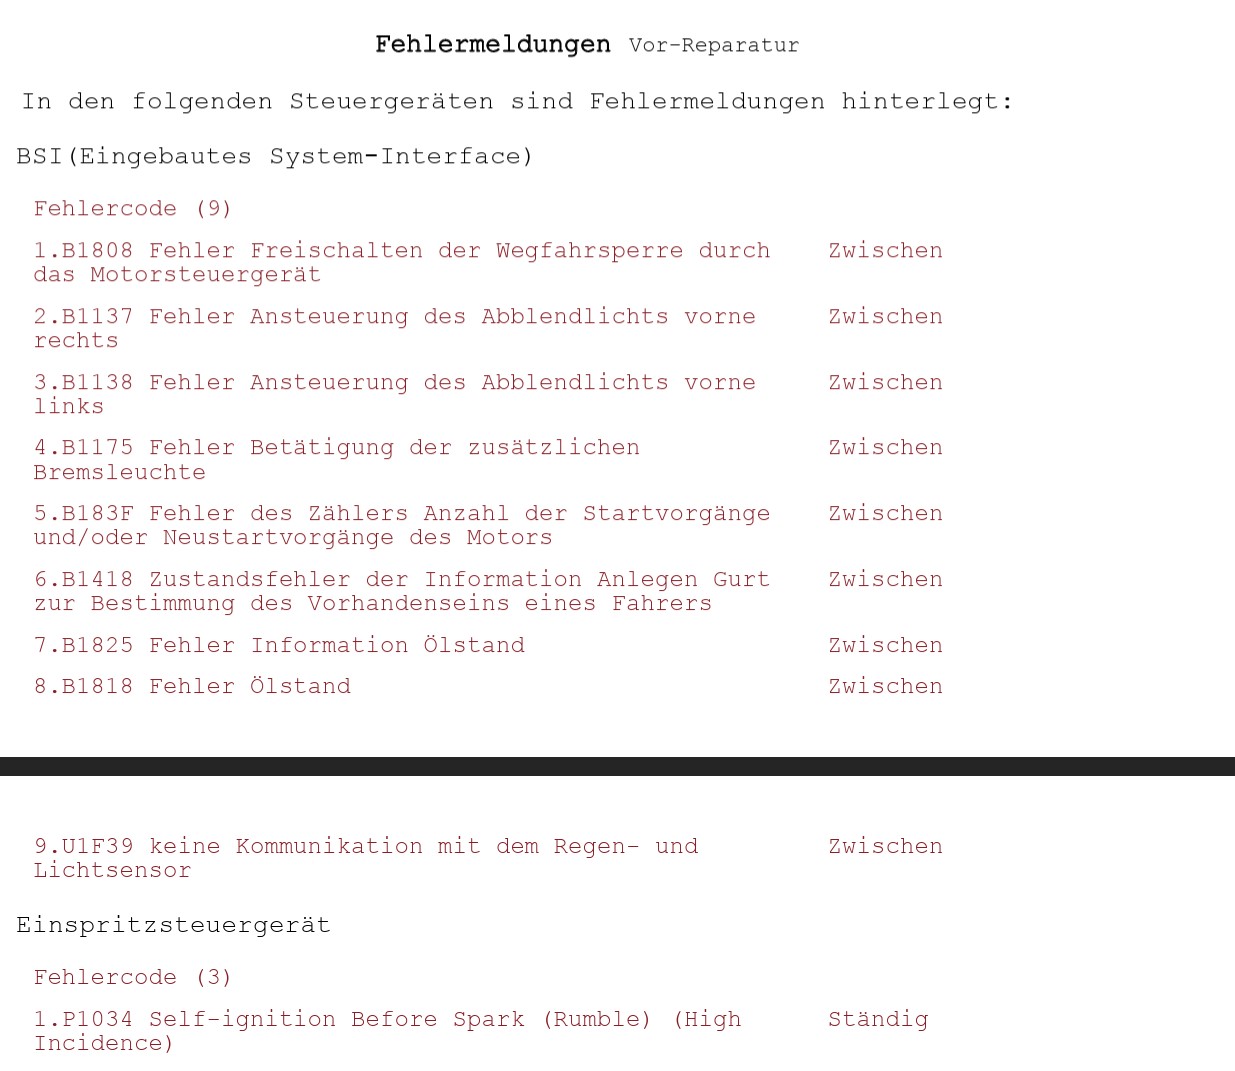
📄 OBD Report 1 – Page 1: first scan with several stored entries.
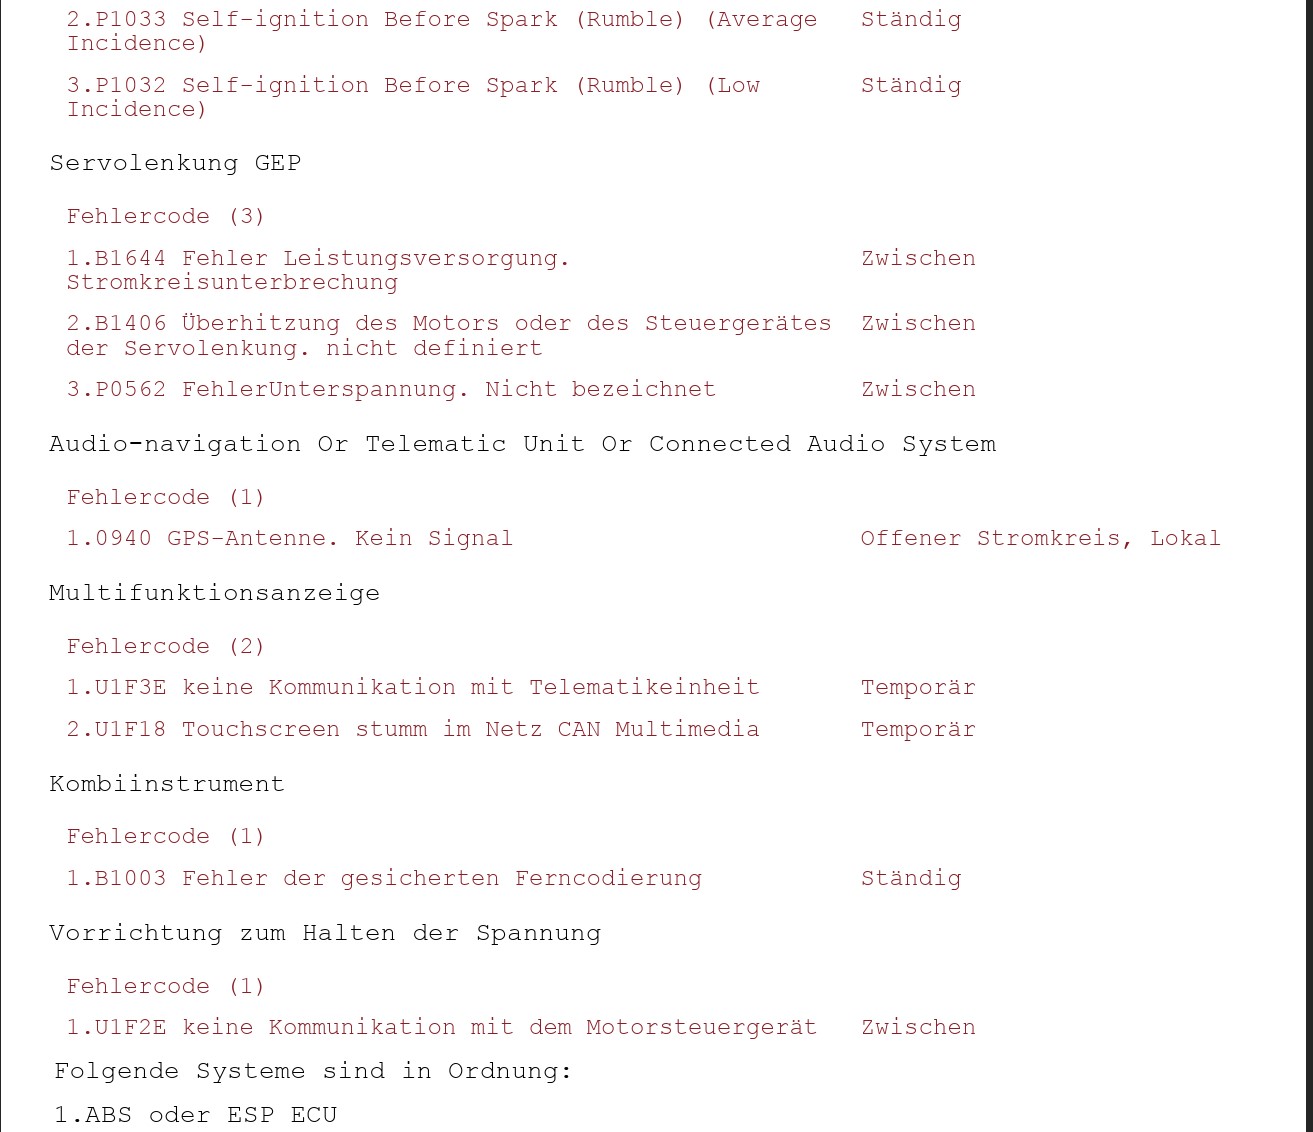
📄 OBD Report 1 – Page 2: continuation of the first diagnostic report.
2️⃣ Second Scan: After Clearing the Fault Memory
After the fault memory was cleared, the system was scanned again. Some entries disappeared, while others remained. Those remaining faults are especially important for the buying decision.
If a fault is still present after a repeated check, this is usually a much stronger warning signal than a one-time historical entry. In this example, the second report showed that the car did not simply store “old faults”, but that at least one relevant technical problem area was still active.
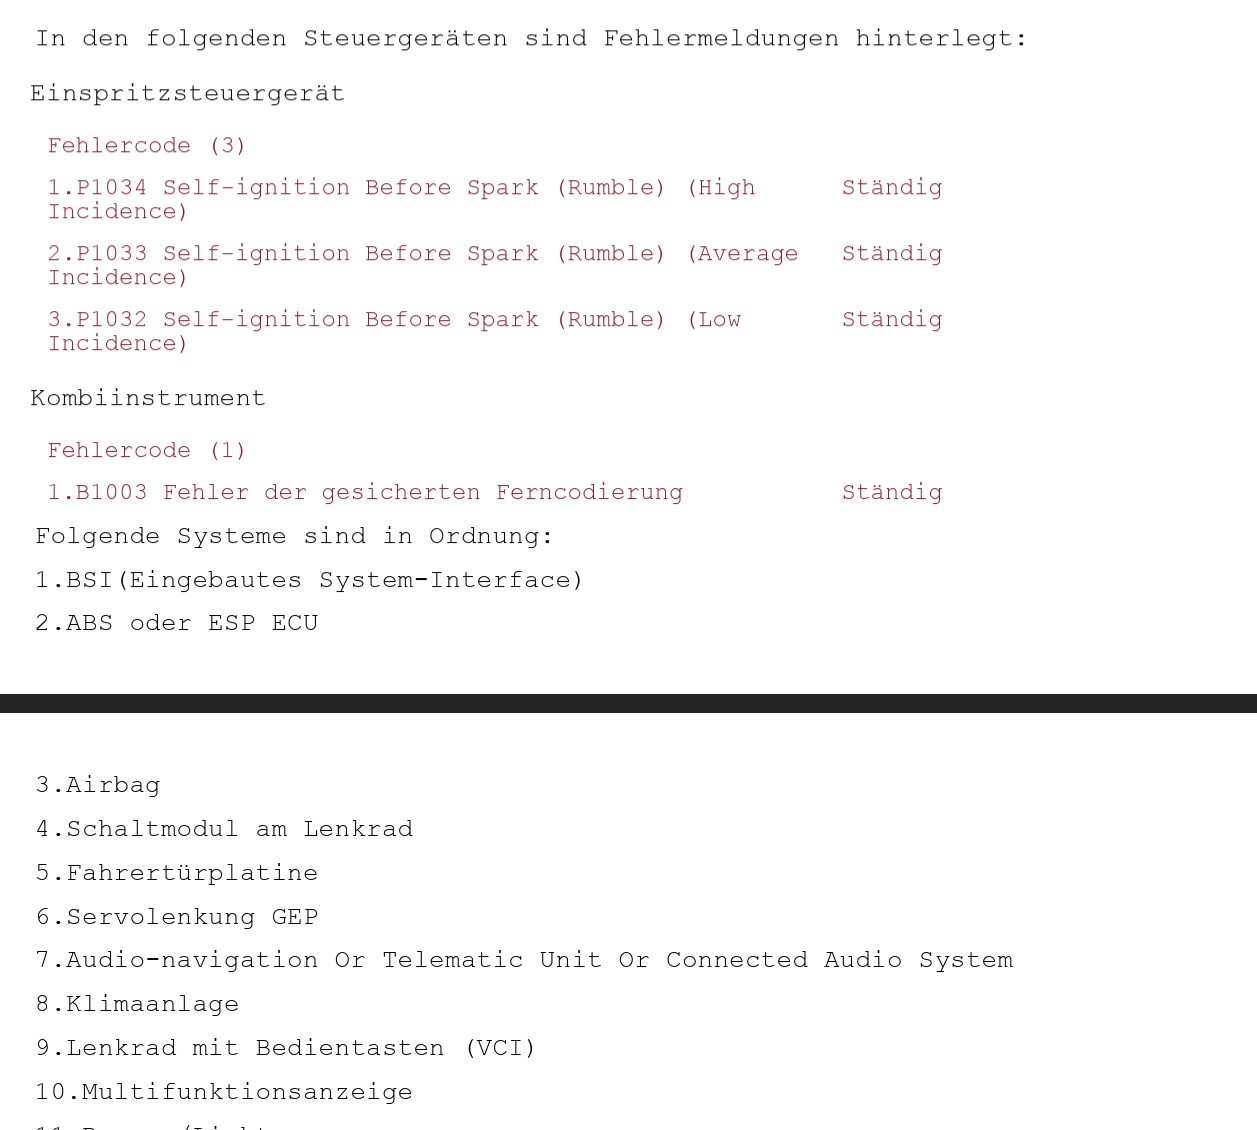
📄 OBD Report 2 – Page 1: second scan after clearing the fault memory.
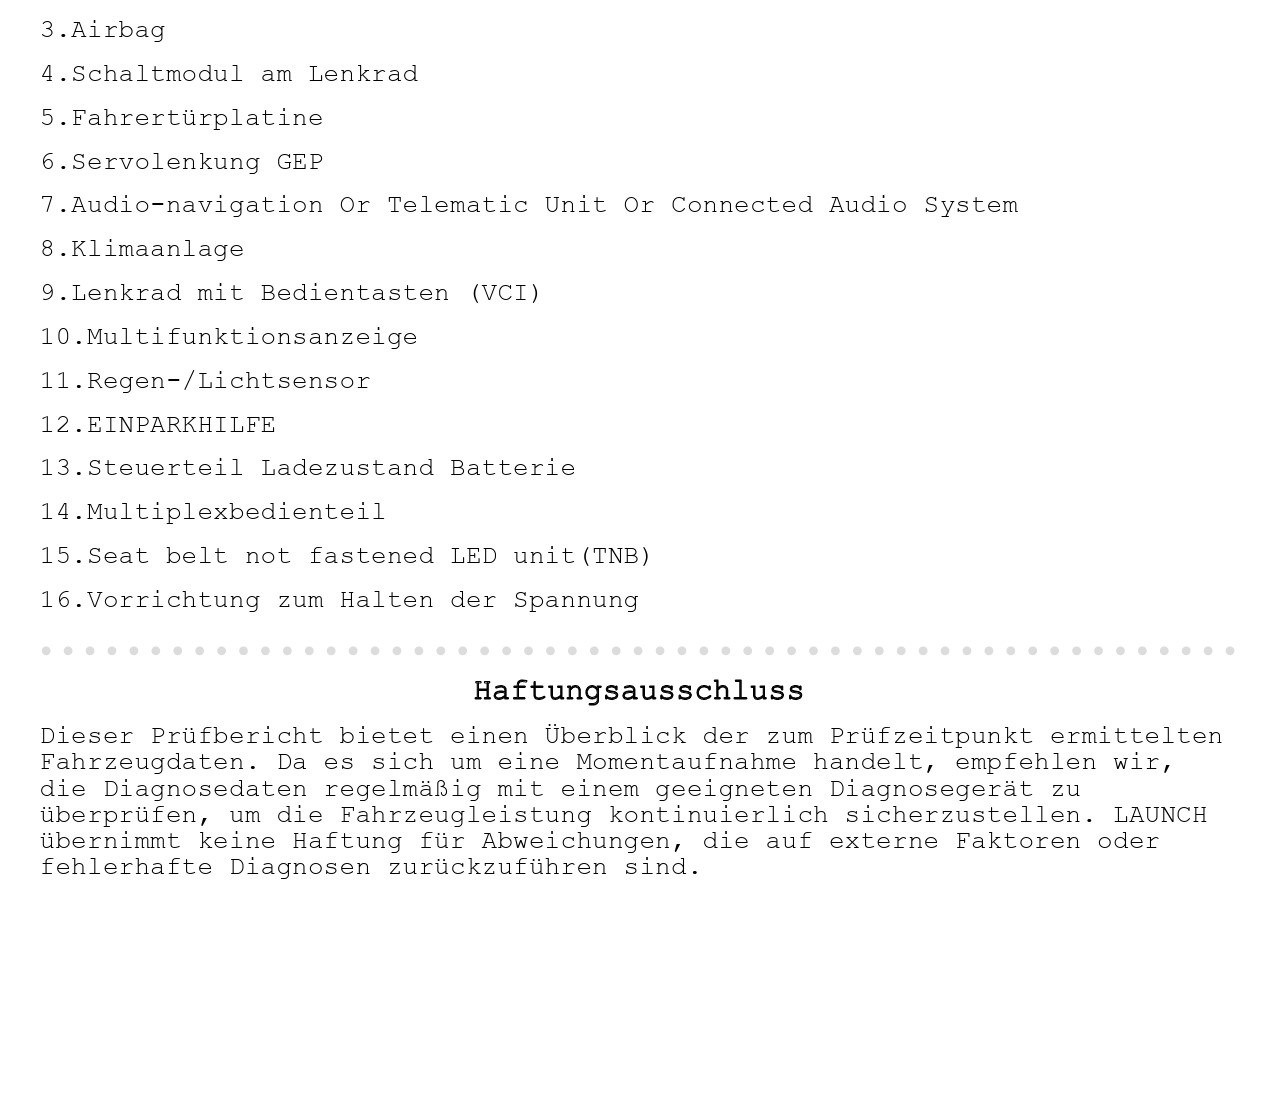
📄 OBD Report 2 – Page 2: relevant entries were still present.
⚠ Important for the buyer: In this case, the decisive point was not the first shock of seeing many fault entries, but the fact that relevant faults were still present after the memory had been cleared. That turned a “maybe negotiable” situation into a clear risk scenario.
🚫 Why the Purchase Was Not Recommended
In this case, the exact technical root cause still required further investigation by a specialist workshop. That is precisely where the professional difference lies between an honest assessment and empty speculation: it would be irresponsible to claim a final repair cause without further inspection, dismantling, or workshop diagnostics.
But for the buying decision, that was not the central issue. What mattered was something else: there was still a technical risk that could not be classified as harmless.
✅ What Initially Looked Acceptable
- engine start without an immediately dramatic impression
- visually not a complete wreck
- normal signs of use instead of obvious total neglect
- for many buyers, “still okay” at first glance
❌ What Changed the Assessment
- relevant OBD entries during the first scan
- faults still present after clearing the memory
- no plausible reason for reassurance
- clear need for workshop investigation before a safe purchase decision
📄 Final note – Page 1: Our opinion does not force rejection, but it clearly highlights the risk.
📄 Final note – Page 2: This is not a guarantee, but a description of the vehicle’s condition at the time of inspection.
Our conclusion for this example:
Purchase not recommended.
The vehicle should only have remained a serious option if the cause had been clearly identified in a specialist workshop and, depending on the result, demonstrably repaired before purchase, or if the buyer had consciously included this technical risk in a very substantial price negotiation.
📚 How Detailed Real Inspection Reports Usually Are
Many buyers initially underestimate how detailed a proper pre-purchase inspection report should be. A useful report is not just “a few photos” and a short text message.
In practice, a complete report often includes:
- 50 or more photos
- videos of the start, running engine, roof operation, or paint measurement
- paint thickness readings with interpretation
- OBD diagnostics with assessment
- a written verdict: buy / only after repairs / only with discount / not recommended
📌 The more suspicious the vehicle, the larger the report. More scratches, dents, stone chips, dismantling traces, oil moisture, fluid residues, rust beginnings, or paint irregularities almost always mean more photos and more explanation in the final report.
🛠 When a Pre-Purchase Inspection Is Especially Worthwhile
A thorough inspection is often most valuable when a vehicle looks “not perfect, but still okay” at first glance. In exactly those cases, the real decision is not made by cosmetic presentation, but by the technical substance.
A report like this does not just save money – it prevents bad decisions. It shows whether a vehicle is actually worth buying, or whether an apparently acceptable impression is hiding an expensive risk.
FAQ — Frequently Asked Questions
Why are two diagnostic reports included here?
Because only the comparison between the first scan and the second scan after clearing the fault memory allows a realistic assessment. Permanent faults are much more serious than purely historical entries.
Does a smooth engine sound automatically mean the vehicle is technically good?
No. A clean start and a calm engine sound are only one part of the picture. Electronic, emissions-related, or control-system problems often remain invisible and only become obvious during diagnostics.
Can a vehicle with such faults still be bought?
Only with caution. A reliable decision should only be made once the cause has been clearly identified in a workshop and the risk has been transparently evaluated. In the example shown here, the purchase was not recommended in its current condition.
How many photos does a real inspection report usually include?
Often 50 or more. The exact number depends on the vehicle size, condition, and the number of irregularities found during inspection.
Related Articles
How to inspect a diesel car before buying: OBD, DPF, AdBlue, and real-world risks
 DSG inspection before purchase: what to check to avoid expensive transmission problems